This is a new chapter in my Notion Basics tutorial series. We all seem to be getting busier. We have to find a balance between our daily work, our private and family life, our side hustles, and our hobbies. In order to manage all this correctly and without making mistakes and forgetting things, we need some kind of list in which we can record, prioritize and keep track of all our activities. You can keep such a to do list on a piece of paper, in a notebook or notepad, or in this modern digital world in a digital format. In this article, I will show how to create a simple to do list in Notion to support your busy life. In an upcoming article, we will continue from here to build an advanced to do application.
Content of the article
- What is Notion
- Requirements for our to do list in Notion
- How to create a simple to do list in Notion
- How to use our simple to do list in Notion
- How to use the special options for your simple to do list in Notion
What is Notion
Before we start building a simple to do list in Notion, it is good to know what Notion is and why it is such a nice platform to build this kind of productivity solution. In my article “Notion Basics – How to get started with Notion” I already gave a detailed introduction to what Notion is and what it can do, so I will not go in too much detail here. But in short, Notion is a kind of LEGO box for everyone who does not want to use separate apps for all their different tasks and activities, but who wants to determine for themselves how their app looks and how it behaves for all their tasks, lists, summaries, texts, journals, administrations, etc. Notion is a solution in which you can create functionalities based on a large number of standard building blocks. You are able to add, edit, move, convert, or delete blocks. Think of block types like Text, Page, Heading, Table, Bulleted list, Numbered list, Image, Video, Table view, Board view, Table of contents, Button, etc.
Requirements for our to do list in Notion
As an IT professional for more than 30 years, I always ask my business stakeholders first to come up with some solid requirements before I start with my team designing, building, and testing a new user application. So before diving immediately into Notion, let’s also determine what our requirements are for our simple to do list.
Goal
As a busy person with a lot of responsibilities, I want a digital to do list in Notion, so that I am able to record, prioritize and keep track of all my activities.
Basic requirements
The to do list should at least offer the below basic requirements:
- The ability to create and manage categories
- The ability to add due dates to tasks
- The ability to prioritize tasks
- The ability to mark tasks as complete
Data to store
The to do list should at least be able to store the below data fields:
- Description of each task
- Due date of each task
- Priority level of each task
- Status (Open + Completed)
- Category of each task
How to create a simple to do list in Notion
Now that we know our basic requirements, let’s start building our own simple to do list in Notion. As already mentioned in the introduction of this article, In a future article I will explain how to create an advanced to do list in Notion. This will take into account related databases as I described in my article “Notion Basics – The importance of Normalization for your Notion databases“. This will not be in scope for this simple to do list we are creating here.
I assume that you already have a (free) Notion account and that you know how to start up Notion. If not, please read my introductory article “Notion Basics – How to get started with Notion“.
1) Start Notion as an app or in your web browser.
2) Create a new page via the “New page” option.
3) Give the new page a name, like “My Simple To Do list”.

4) Click on Empty page and type “/” to open the available commands.
5) Type “Database” and select “Database – Inline”.
Now you see a screen that looks like this:
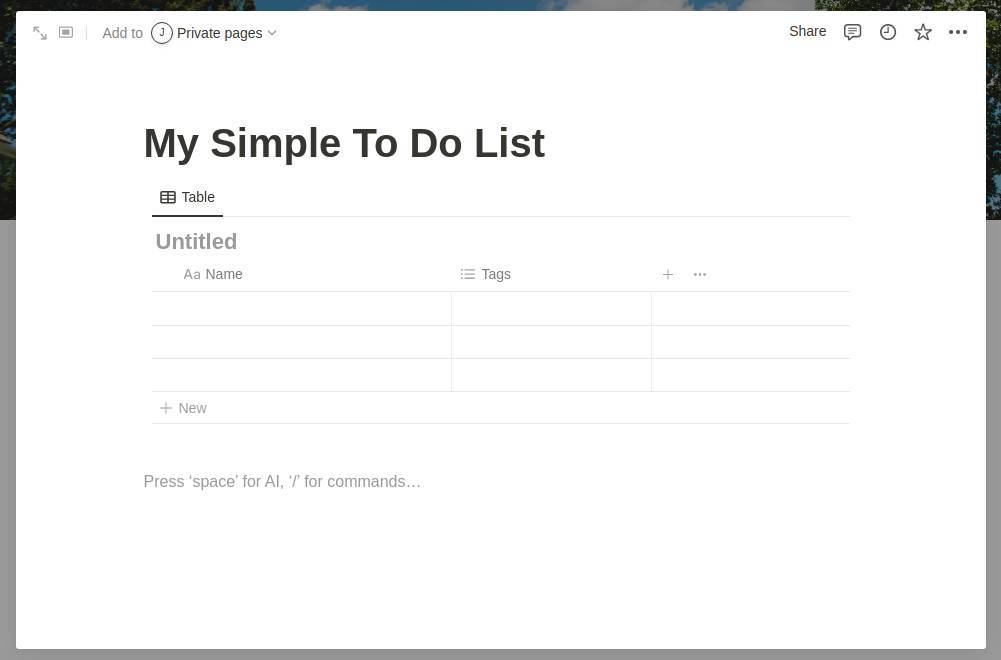
On this screen, you see an empty table. Here we can implement all our requirements. This is the foundation for our simple to do list.
6) Click on Untitled and type “To Do List”.
7) The first column “Name” can’t be deleted but can be renamed. Click on the header and rename this column to “Task description”.
8) Rename the “Tags” column into “Category” and select “Edit property”.
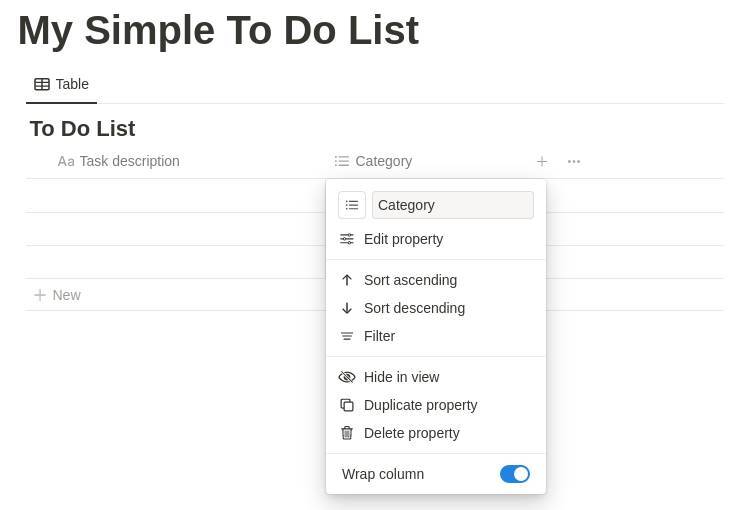
9) Make sure the column is of type “Select”. This makes sure that every new category you add can be selected in a new task row. It allows you to always select only one of the available values.
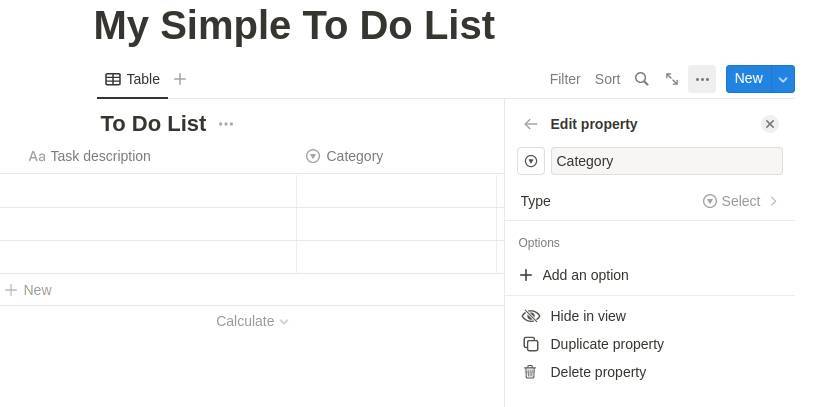
To leave the Edit property section click on a white area in the screen.
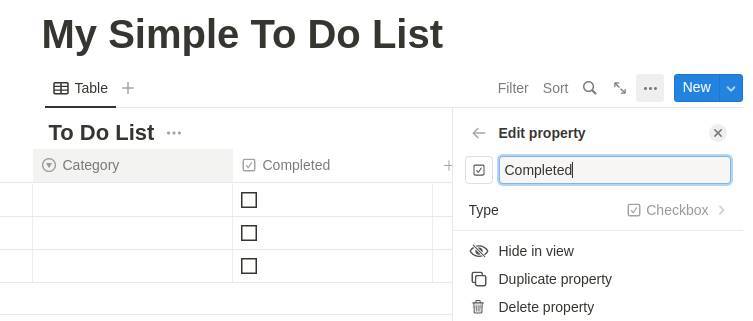
10) In the third column click on the “+” sign to add a new column. Select the property type “Checkbox” and give it the name “Completed”.
11) In the fourth column click again on the “+” sign to add a new column. Select the property type “Select” and give it the name “Priority”.
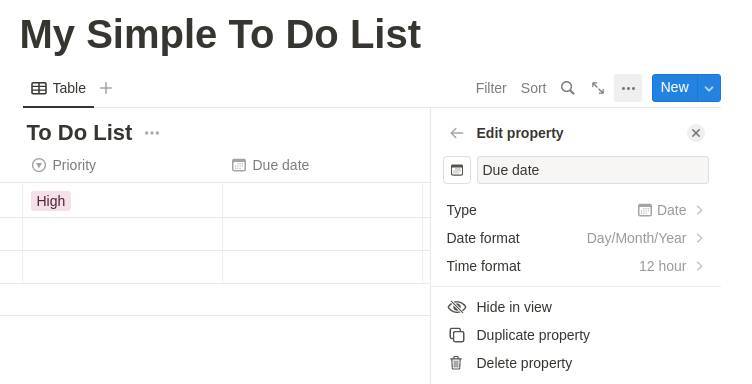
12) In the fifth column click again on the “+” sign to add a new column. Select the property type “Date” and give it the name “Due date”. Select a Date format you prefer.
That’s it.
How to use our simple to do list in Notion
Now that we have implemented all the properties we described in the requirements section, let’s see how we can set up and use our simple to do list.
1) Create your first task by clicking on the first empty field under Task description. Type for example, “Write chapter 1 of book”.
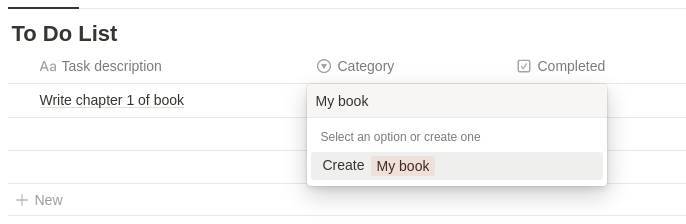
2) Add a new category by clicking on the first empty field under Category. Type for example, “My book” and click on Create. This category can now be selected if you add a new task. The list of available categories will grow if you add more of them while adding new tasks.
3) Go to column Priority and click on the first empty field. Type for example, “High” and click on Create.
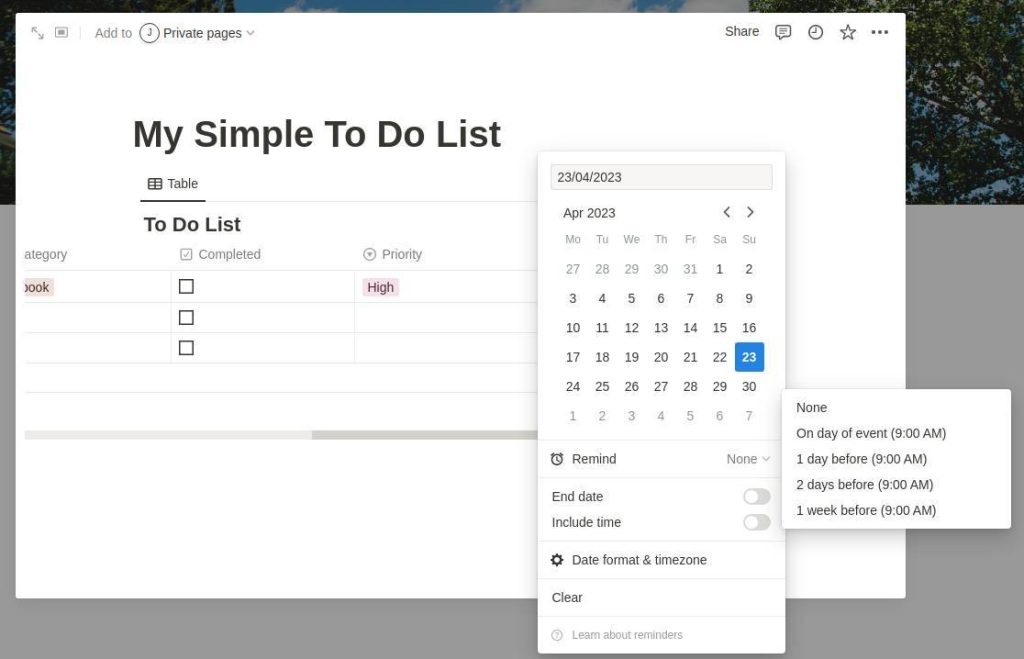
4) Add a new date by clicking on the first empty field under Due date. A date picker pop-up will be visible. Here you can select a date, select a reminder, enable End date, enable Include time, go to settings for Date format & timezone, and select Clear. I keep all standard options.
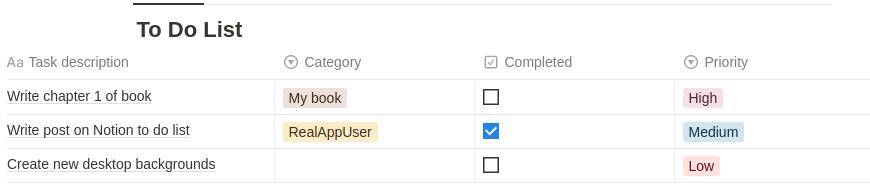
5) Let’s create some extra tasks with different Categories and Priorities.

6) Mark one of your tasks as completed by clicking on the area under Completed. Now you will see a nice check mark that indicates it has the status Completed.
How to use the special options for your simple to do list in Notion
Maybe you already noticed some additional icons and indicators around your simple to do list in Notion. Let’s have a look at what they mean and can do for you.
When you hover your mouse over your to do list, you will see some icons popping up:
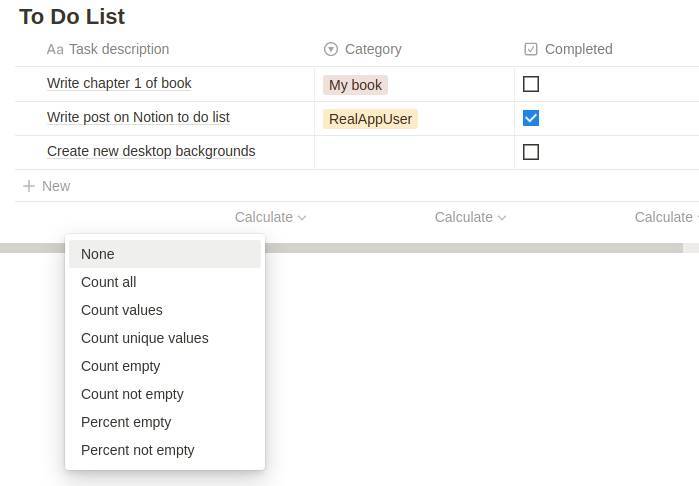
Calculate
Under each column of your to do list you see the Calculate option. When you click on it you will have a list of options for you to choose from. You can count the total number of rows, if applicable you can count values, count unique values, percent empty, etc.
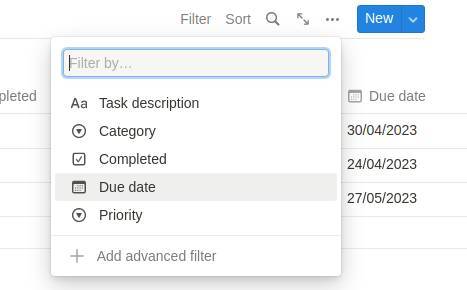
Filter
When you click on Filter you have the option to filter your to do list on the different columns you defined. You also have the option to add an advanced filter.
1) Select “Completed”.
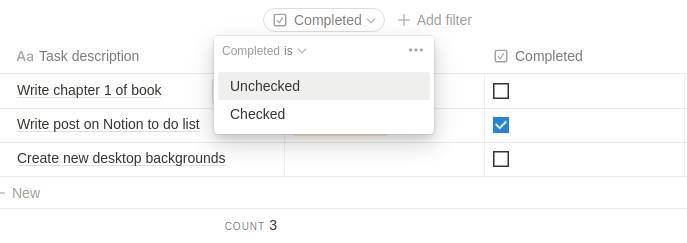
2) When you select “Unchecked” you will only see the not completed items.
Now let’s have a look at the advanced filter.
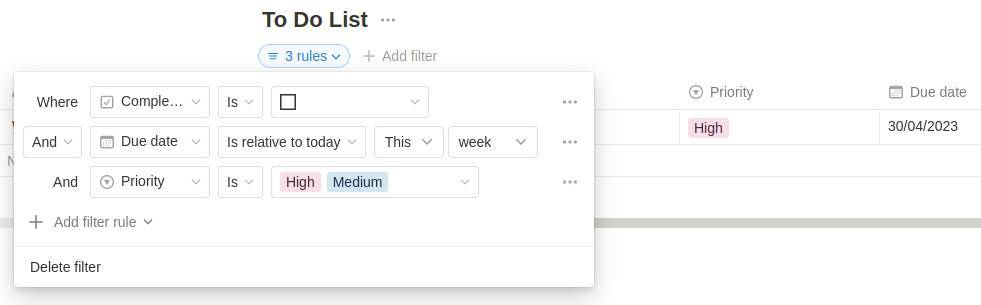
1) Again click on Filter. You have the option to add an advanced filter. Click on it.
Here you can combine different components to build an advanced filter like below:
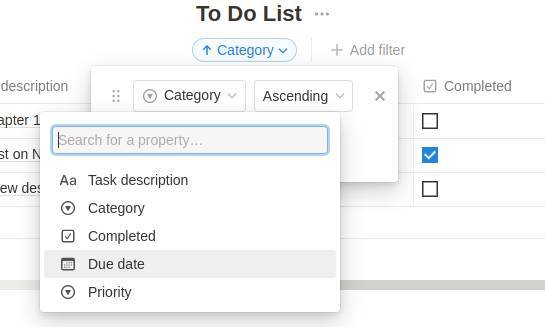
Sort
With the Sort option, you can select which columns you want to use to sort your data and in which order. you can combine different columns.
Search
With Search, you can type a keyword for your search query.
Open as full page
With Open as full page your view on your to do list will be extended to the available space in your app or browser window.
Final words
In this article, I explained how to create a simple to do list in Notion from scratch. You learned how to create a table, how to create columns and change their properties, and how to use different options like search, and filter. I hope it helps you to take your first steps in the beautiful and extensive Notion world. In a future article, I will focus on building an advanced to do list. In this article, we will discuss and combine many more options of Notion. Soon I will also publish an article with an explanation of all available blocks in Notion. So keep an eye on the website.